Set Up Facebook Login
Attenders can log in to your Church Online Platform using their Facebook credentials. When they do, Facebook authenticates them, and a user account is automatically created within the Church Online Platform. This involves a two-step process between Facebook and the platform.
Setting up the Facebook App
- Go to developers.facebook.com and create an account, if needed.
- Click My Apps.
- Click Create App.
- Under App Details:
- Select an App Name (i.e., ChOP SSO).
- Provide an App Contact Email.
- Under Use Cases:
- Select Authenticate and request data from Facebook login.
- Under Business:
- Select Your Business Portfolio (or create one).
- Under Requirements:
- Review your publishing requirements, which should be Business Verification and App Review.
- Under Overview:
- Review the summary and click Go to Dashboard.
- Under App Details:
- Under Dashboard, review each of the requirements. Fill in any data until you have a green checkmark for each:
- Customize and Authenticate:
- Give permission for email address.
- Under Settings:
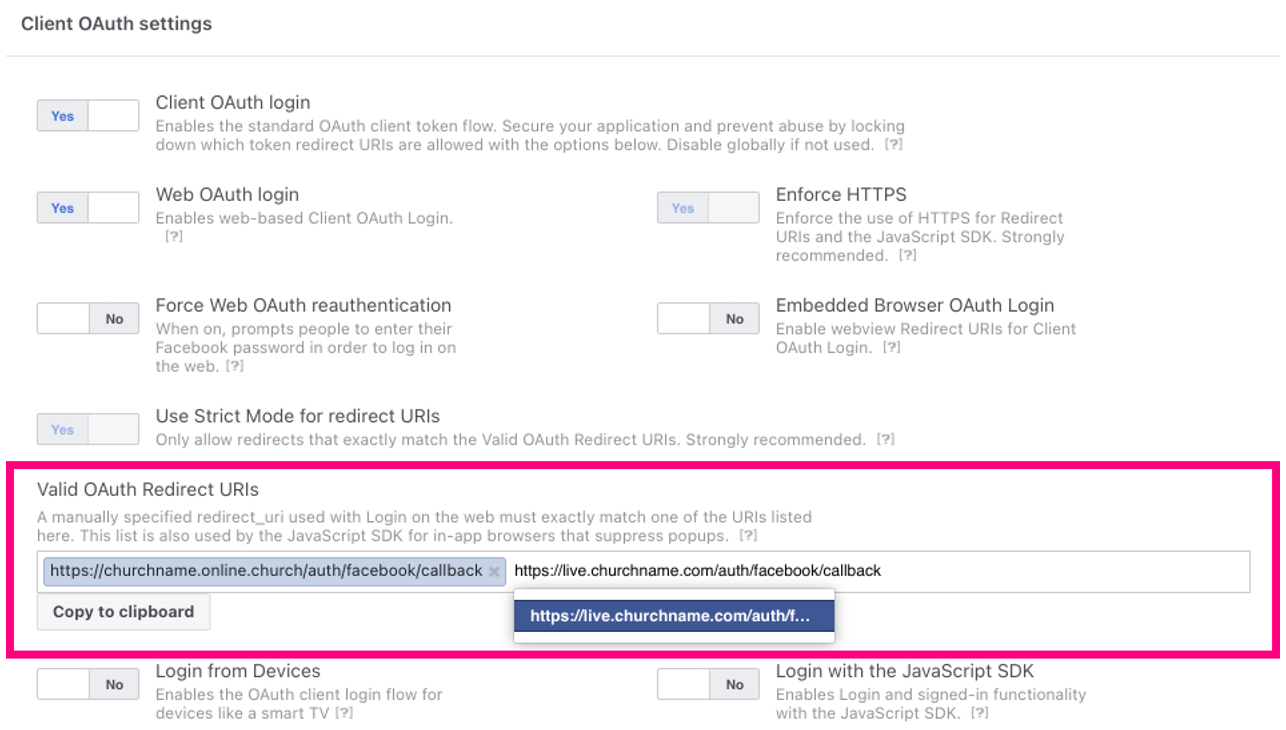
- In the Valid OAuth Redirect URLs section, enter your Church Online Platform URL and Custom Domain (if you are using one), and add /auth/facebook/callback.
- Example: https://churchname.online.church/auth/facebook/callback Also, if you have a Custom Domain, add that too.
- Example: https://live.churchname.com/auth/facebook/callback
- NOTE: Do not use the Quickstart guide.
- In the Valid OAuth Redirect URLs section, enter your Church Online Platform URL and Custom Domain (if you are using one), and add /auth/facebook/callback.
- Save changes.
- Review testing requirements (and you can test now or later).
- Review Business Verification.
- App Review:
- Add your privacy URL or https://www.life.church/privacy/
- Add data deletion policy URL or https://www.life.church/privacy/
- Select a the category Lifestyle.
- Customize and Authenticate:
- Click Publish.
- Get App Settings:
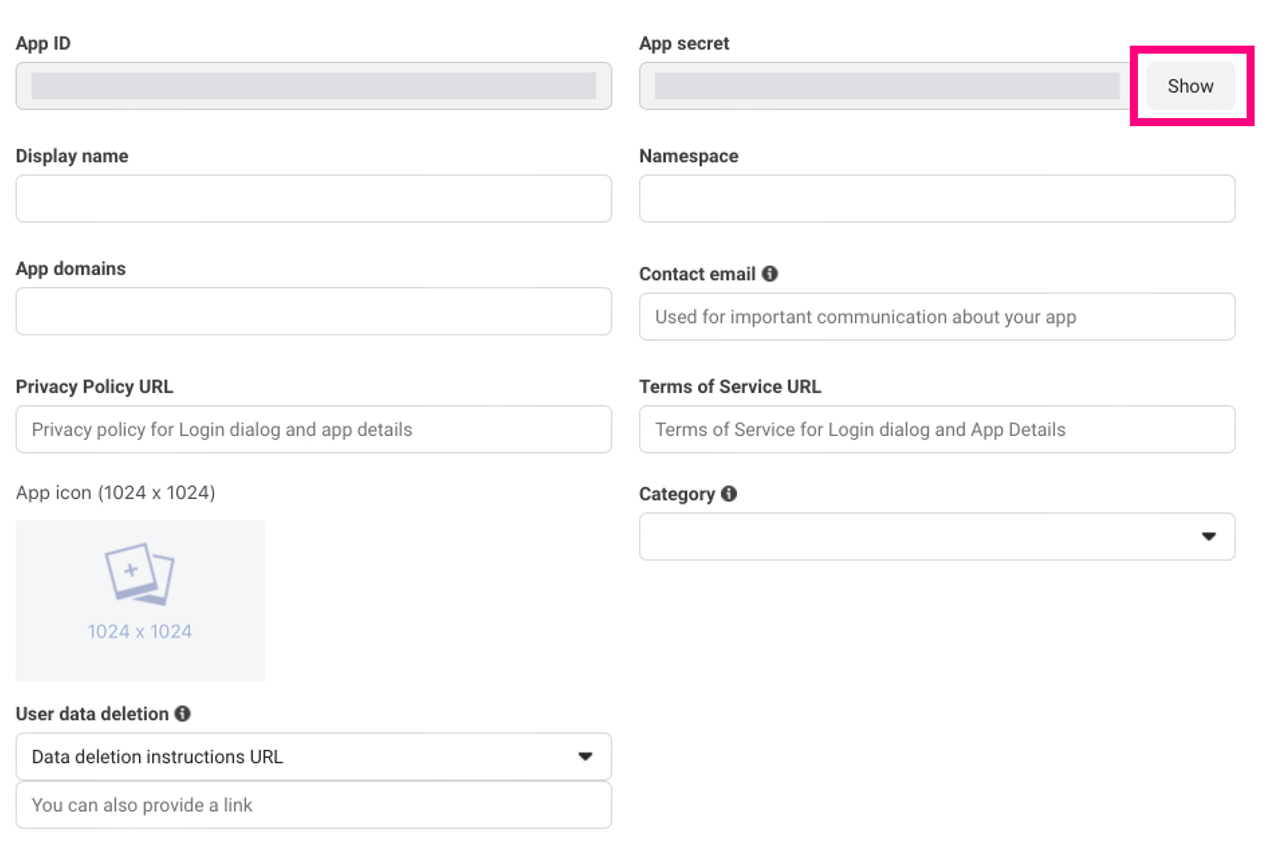
- Go to the side menu and click App Settings > Basic.
- Select Show and copy the App ID and App Secret for a later step. Keep the Facebook developer tools page open.
- Check your privacy policy URL
- Check your Data Deletion URL. (i.e. This can be the same as your privacy policy URL if is your policy specifies the information.)
- Set your Terms of Service URL (you can use your own or use https://churchonlineplatform.com/terms/)
Setting up the Facebook Login within the Church Online Platform
- Log in to the Admin in your Church Online Platform account.
- Go to Admin > Integrations > Facebook.
- Paste the Facebook App ID and App Secret you copied earlier into the correct fields.
- Click Save.
Turn on the Facebook Application
- Once you have the Facebook integration set up in the Church Online Platform, navigate back to the Facebook developer tools page.
- Navigate to Go live in the left menu.
- Fill in any required fields.
- Click Go live at the bottom of the screen.
