Using Moments During a Service
Manually Post a Moment
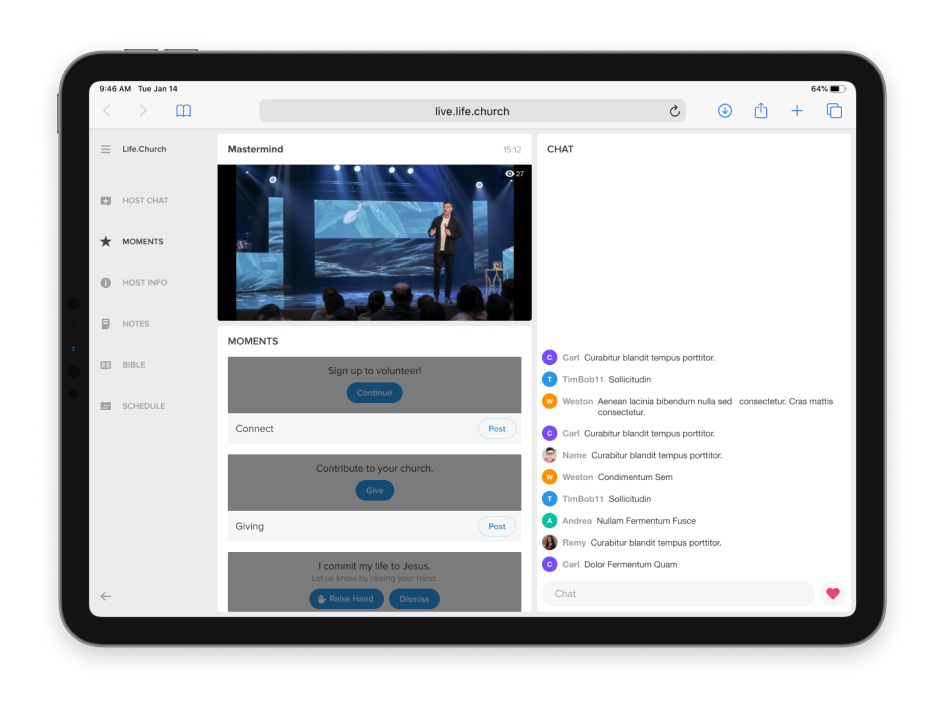
Moments are used to reach and engage your attenders during a service. To allow attenders to see Moments, they need to be posted. Anyone with the Host, Admin, or Owner role can access the Host Tools where Moments can be posted during a Service.

- Once your Service is under way, you will have access to the Moments tab.
- Every Moment you added to a service will be displayed here.
- To post a Moment to the Public Chat, tap the Post button for the corresponding Moment.

Automatically Post a Moment
You may want to schedule moments to post automatically so that hosts are freed up to focus on chat and prayer requests.
Setting up the Schedule

To schedule Moments for a service:
- Edit your service's content from admin by adding in title, video details, notes and more.
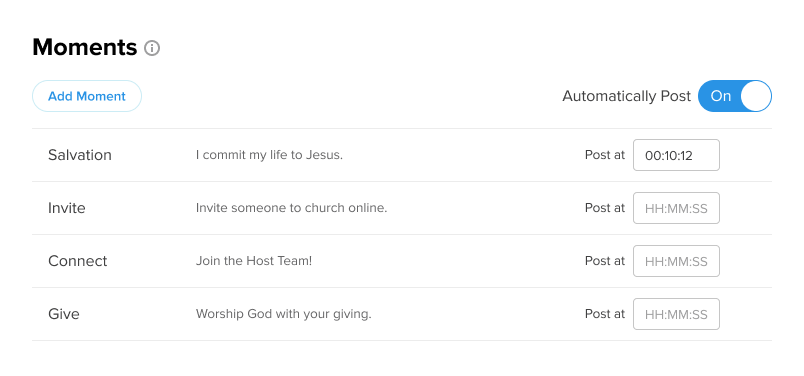
- Turn on the Automatically Post switch within your service content.
- Choose a time for each Moment to post.
The post time for Moments is based on the earliest start time of your chat in your service. For example, if your service starts at 10:00 AM, but you have chat starting 5 minutes before, making it 9:55 AM, the moments timing will start at 9:55 AM. See Understanding Service Timing.
To schedule the same moment to post at multiple times, simply add another instance of that moment by tapping the "Add Moment" button and setting a unique time for it to post.
Overriding Automatically Posted Moments
When Moments are set to post automatically, hosts will no longer need to post the Moments at specific times. But, should hosts need to take over, they are able to disable the automatic posting of moments. Any unique moment that was added to the service will be able to be posted manually.
Hosts will be able to toggle the automatically posting of moments back on and the posting schedule will pick up at the correct time for each moment.

Delete a Moment
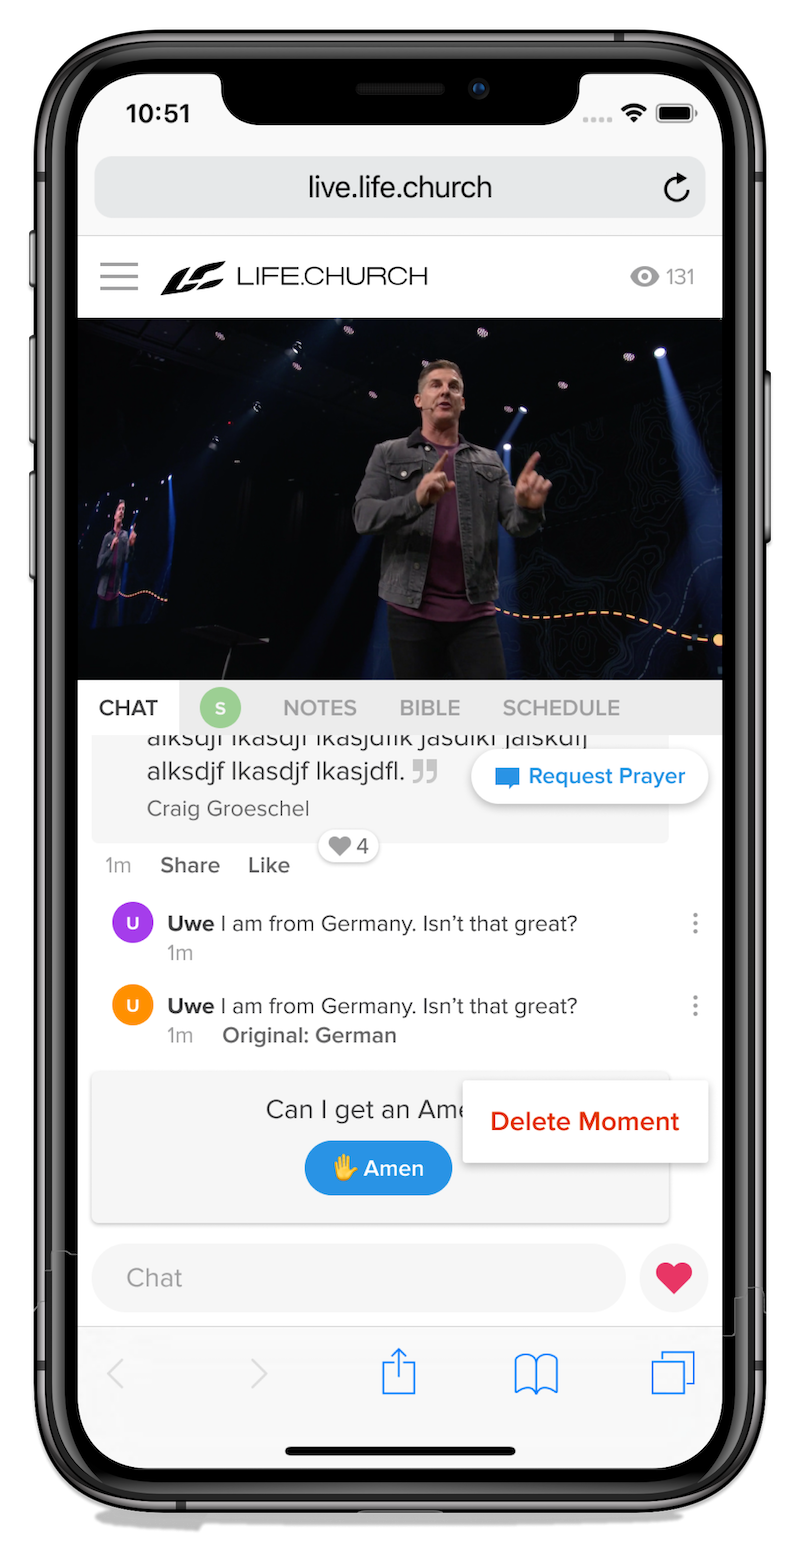
Accidently post a Moment you didn't mean to? No worries! Simply click the 3 vertical dots to the right of the Moment & click the "Delete Moment" button.