Setting Up a Salvation Moment
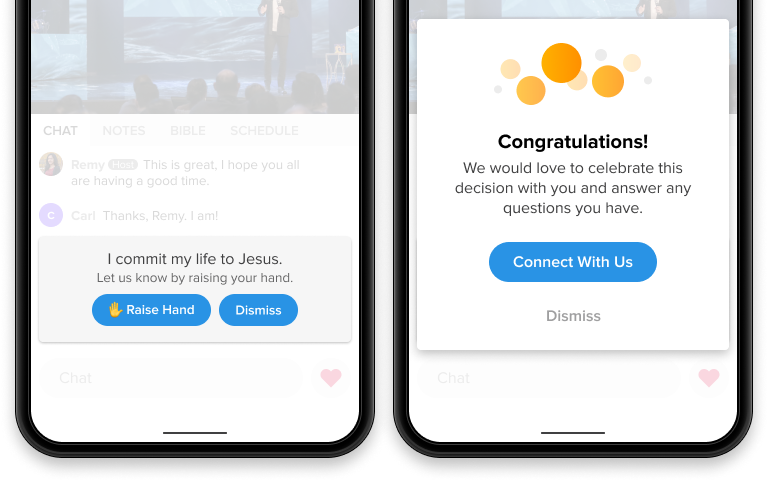
The Salvation Moment allows attenders to indicate a decision to follow Jesus during your online service.
As an Admin, you can choose between two types: a Localized Salvation Moment or a Custom Salvation Moment.
What's the difference between the two?
Localized Salvation Moment (Default)
The localized Salvation Moment uses preset call-to-action and response text that cannot be edited. These preset messages are automatically translated based on the attender’s geographic region and language preferences.

After an attender clicks Raise Hand, you can choose one of the following follow-up actions:
- Request prayer with Hosts
- Open a form or page in a new browser tab
- Open a form or page in an iframe modal
- Do nothing (only shows a count of raised hands)
Custom Salvation Moment
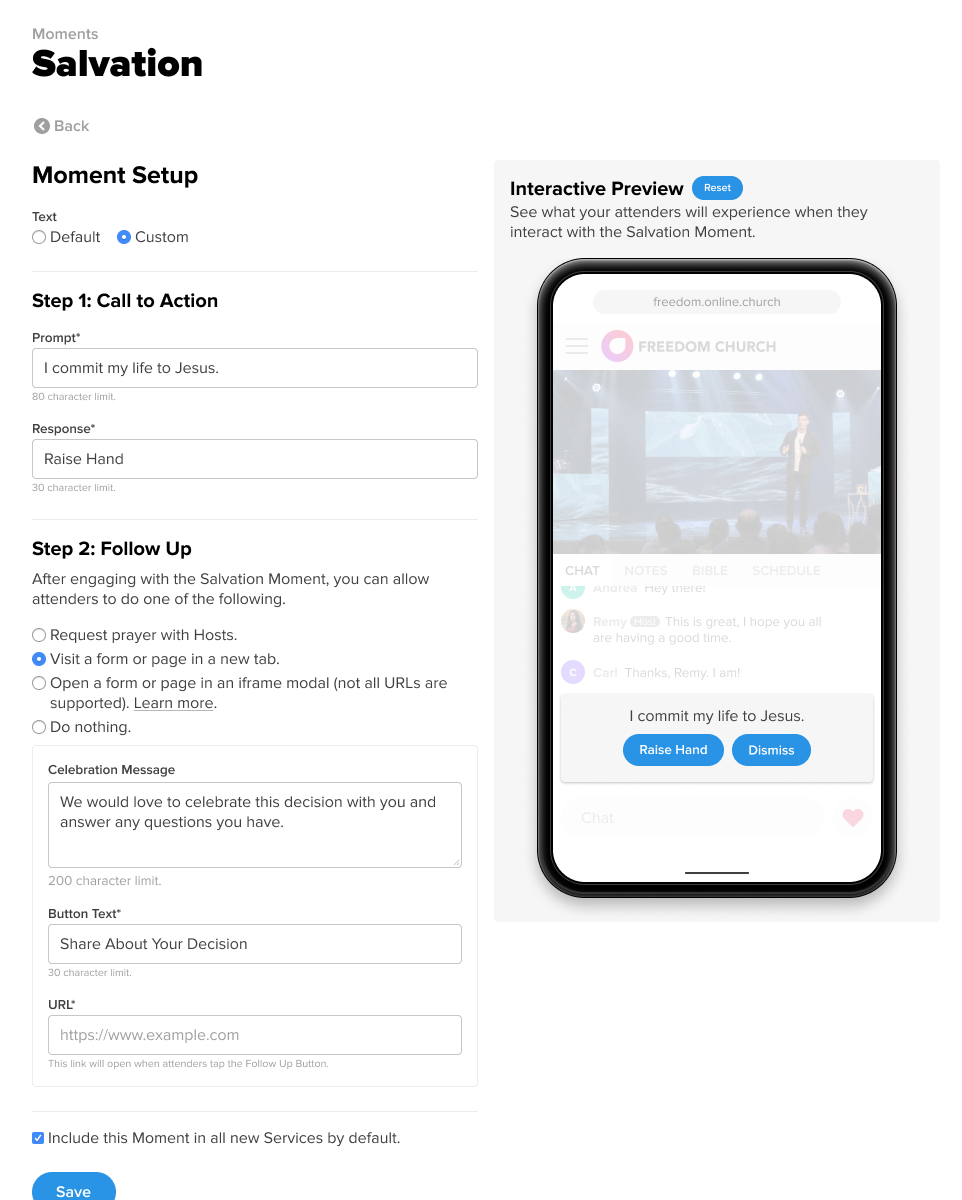
This option allows you to write your own prompt and response text.

After setting up your message, choose a follow-up action:
- Request prayer with Hosts
- If Live Prayer is enabled, Hosts receive a prayer request notification.
- If Live Prayer is disabled and Offline Prayer is enabled, that option is shown instead.
- Open a form or page in a new tab
- Attenders will see a button linking to the URL you provide (e.g., a response form).
- Open a form or page in an iframe modal
- Opens the page within the Church Online experience as a modal overlay.
- Note: Not all websites support iframe loading. Test your URL in the Interactive Preview before use.
- Do nothing
- The attender sees the count of others who have raised their hands but receives no additional action prompt.
How to Set It Up
- Log in as Admin.
- Navigate to the Moments tab and select Add Moment
- Select Salvation.
- Under Moment Setup, choose between the Localized or Custom Salvation Moment.
- If using the Custom option:
- Enter the prompt text.
- Enter the response text.
- Select a follow-up action (see options above).
- If applicable, enter the URL for follow-up.
- Check or uncheck the box next to "Include this Moment in all new Services by default."
- Click Save.