Setting Up Dark Mode

Admins can enable dark mode in the Appearance settings, giving attenders the option to toggle between dark mode and light mode on their mobile or smart devices. You can also set dark mode as the default view for your online attenders.
Enable Dark Mode
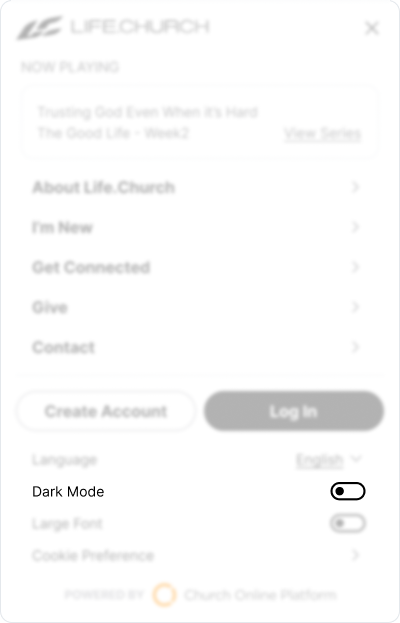
When you enable dark mode in your Church Online Platform account, you give attenders the option to toggle between dark mode and light mode as their preference.
To enable dark mode, follow these steps:
- Log in as Admin.
- Go to Setup > Appearance.
- Scroll down to the Default Theme section.
- Choose On.

- Click Save.
Set Dark Mode as Default
Admins can make dark theme the default viewing experience for online attenders.
Here's how to set dark mode as the default view:
- Log in as Admin.
- Go to Setup > Appearance.
- Scroll down to the Default Theme section.
- Choose On under Enable dark mode for your attenders? (If you haven't already.)
- Choose Dark under Choose the default theme for your church.
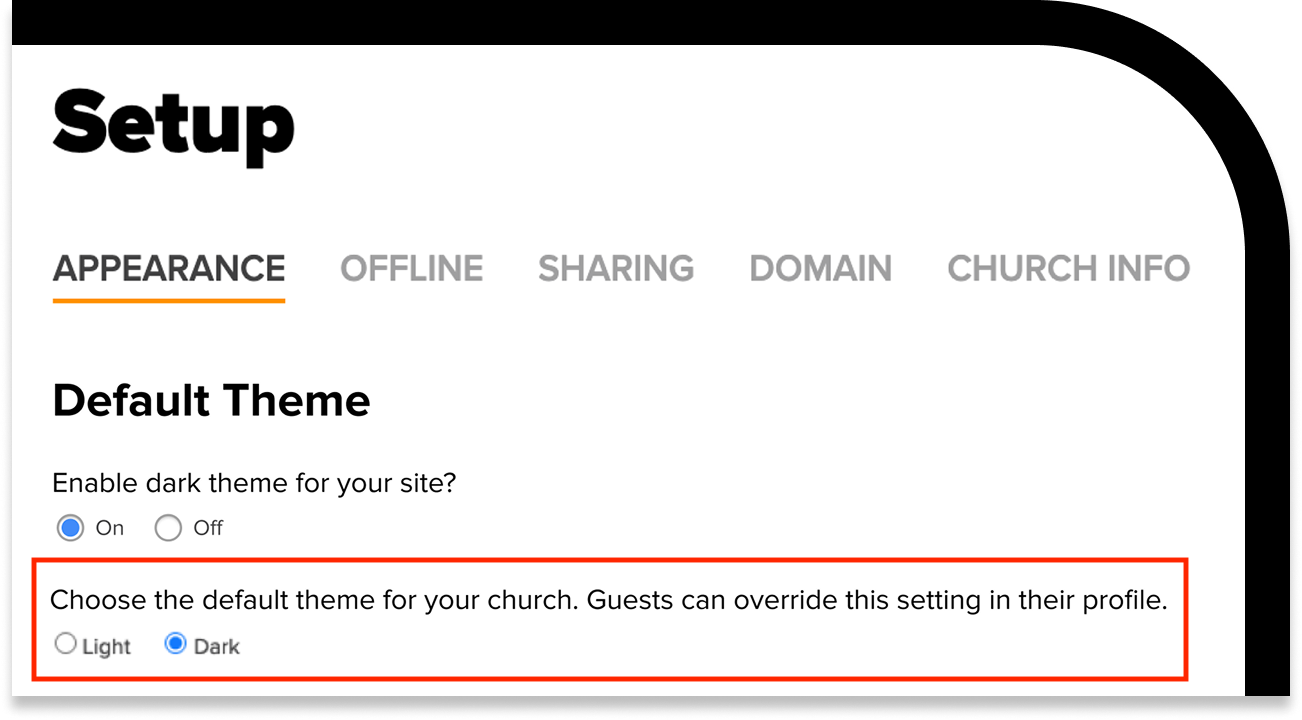
- Click Save.
Add a Second Logo Compatible with Dark Mode
If you enable dark mode for your audience, be aware that the top navigation banner will be set to black whenever dark mode is turned on. You can add a second logo in the Appearance settings to ensure your church logo is visible in dark mode.
Follow these steps to add a dark mode logo:
- Log in as Admin.
- Go to Setup > Appearance.
- Scroll down to the Header Appearance section.
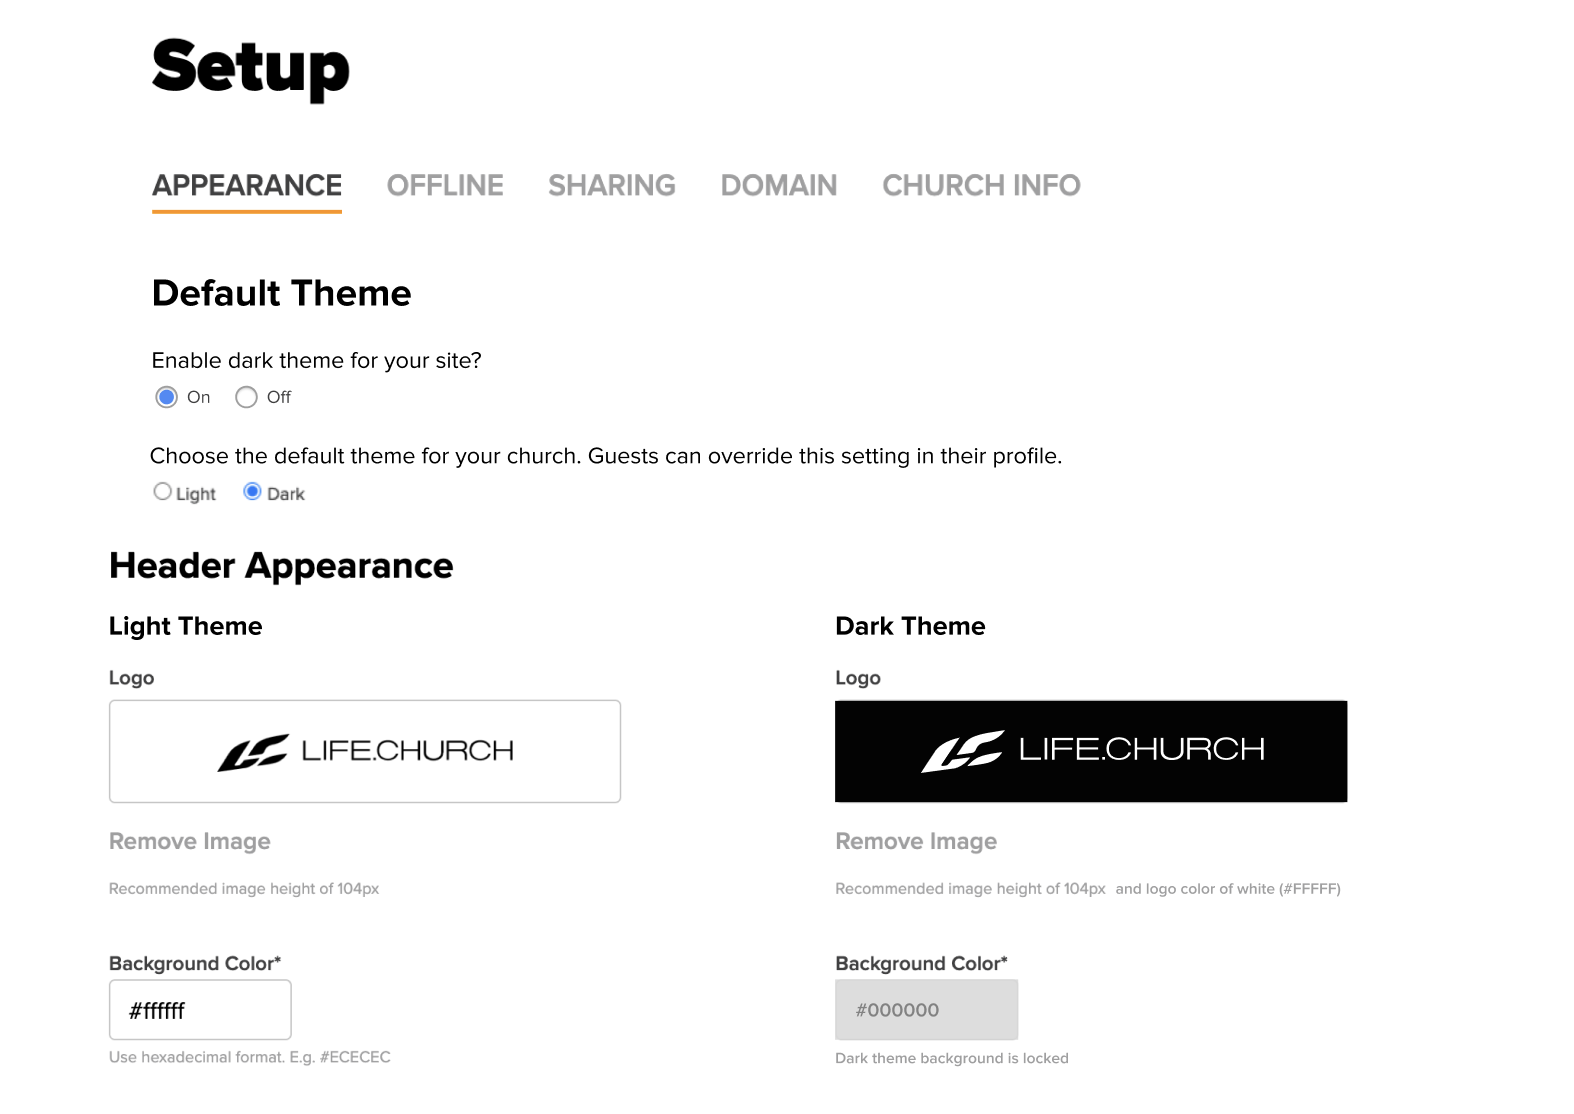
- Click Choose a File, and upload your dark mode logo.
- Click Save.
Customize Your Logo for Dark Mode
Here's what we recommend when choosing a logo for dark mode:
- Edit your original logo using any image editing software. If you don’t have image editing software, Adobe Photoshop (Paid) or Photopea (Free) are good options.
- Edit your logo based on the compatibility examples. Below we list further suggestions when creating your dark mode logo.
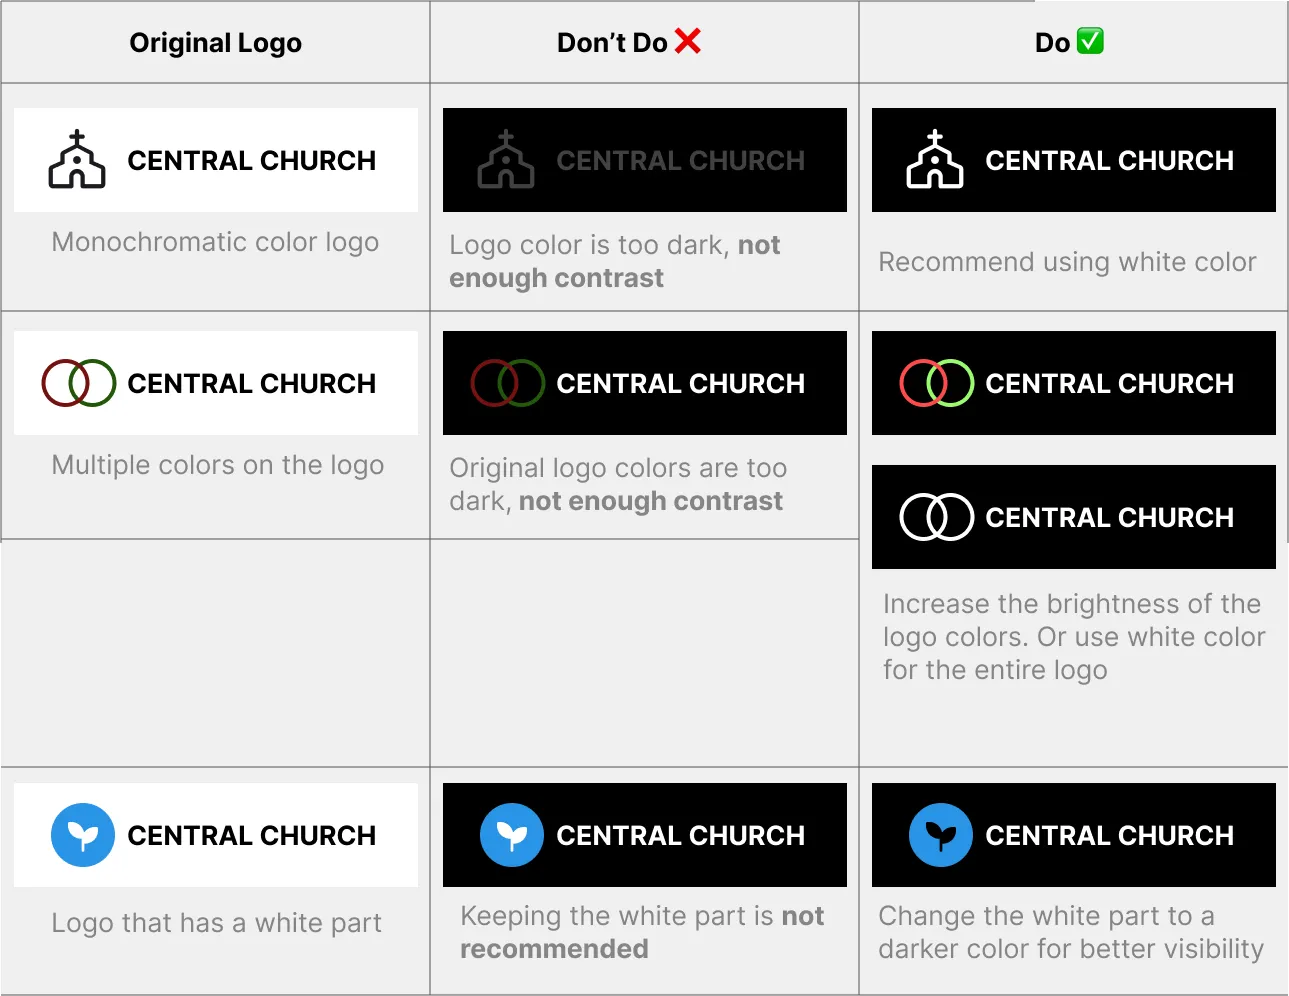
- Use Light Colors
- The header background color on dark mode is #1A1A1C, so your logo should be white, light gray, or other high-contrast colors that stand out well against a dark background. Avoid dark colors, as they will become invisible or hard to see.
- Transparent Background
- Please upload a PNG file with a transparent background. This helps your logo blend seamlessly into the site’s dark theme.
- Maintain Original Proportions
- Don’t stretch or squash the logo. Keep it in its original aspect ratio to avoid distortion.
- The recommended size is 404 x 104 pixels.
- Use Light Colors
- Once created, export your new logo as a PNG file and upload it to your Church Online Platform.
"Convert this logo to a dark mode version and export it as a high-resolution PNG with transparent background. Replace dark elements with lighter tones (if logo is black, change it to white) to ensure high visibility on dark backgrounds. Keep the original design, proportions, and sharpness. Ensure the logo edges are clean and crisp. Output format: PNG, transparent background, suitable for display on black or dark gray websites or apps."